Key Takeaways
- Our step-by-step guide will show you how to remove blinds from windows without causing any damage.
- Learn the Banana Technique, a quick but risky method for removing numerous blinds simultaneously.
How to Remove Roller Blinds
Roller blinds are a perfect blend of style and function. Here’s a quick guide to removing them, whether you have standard or cassette roller blinds.
- Gather your necessary tools: To take down your roller blinds, you will need a drill or screwdriver. A step ladder can also be helpful if your window blinds are installed high up.
- Prepare the blinds: Roll up your blinds entirely before removing them to safeguard the fabric and prevent obstruction. If the pull string mechanism is damaged and you cannot operate it, manually rotate the blind spool counter-clockwise using your hands.
- Remove the safety devices: If you equip your blinds with a chain safety clip or clamp, remove them before proceeding. These devices keep the cords stretched along the wall at their maximum distance from the roller blind.
- Remove the blinds: The removal process depends on the type of roller blind bracket you have.
Springloaded brackets:
- Hold the blinds with one hand.
- Use a screwdriver or dull knife to push back the pin-end bracket locking mechanism.
- The blinds will pop out, allowing you to lift them off the brackets.
Serrated disc brackets:
- Rotate the serrated disc counter-clockwise until it clicks.
- Pull the blinds off the bracket.
Cassette roller blinds:
- Place your hands behind the blind cassette.
- Push the metal prongs on the back up one side at a time.
- Lift and remove the cassette.
- Take down the brackets from the wall: Unscrew the screws securing each piece. If the brackets are covered or sealed, you’ll need to remove the bracket covers first before accessing the screws.
- Store the blinds properly: Store your roller blinds properly after removing the brackets to preserve their condition. Roll them up neatly to avoid creases or bends in the fabric. Secure them with masking tape and store them in a dry, safe location away from direct sunlight.
Bonus tips:
- Multiple blinds? Tackle them one at a time. Label each blind and its corresponding brackets/screws to avoid confusion.
- Reinstallation: Keep the brackets and hardware organized before putting the blinds back up and ensure they are in good condition.
- Filling screw holes (optional): If you’re not reinstalling blinds soon, fill any screw holes with packing paste. Let it dry, then paint it to match your wall.
How to Remove Venetian Blinds

Inspect your Venetian blinds, aka horizontal blinds, to locate the headrail containing the pull string and the mechanisms that raise the blinds. Brackets within the headrail can conceal the connection to the wall for a sleeker look. Here’s how to remove them:
- Prepare: Pull the string downward to open the blinds fully.
- Remove the headrail (3 options):
- In some models, gently pull the entire headrail towards you to release it from the brackets.
- Alternatively, press the front panel of the headrail to activate its spring-loaded door, uncovering the removable headrail inside.
- If these methods don’t work, avoid forcing the headrail. Instead, use a screwdriver to loosen a front bracket and open the headrail casing to slide it out. For this purpose, many models have a visible seam at the front bottom of the headrail.
- Remove the brackets: Set the blinds aside once the headrail is detached. Use a screw gun or screwdriver to remove the screws from the brackets on both sides of the window frame.
How to Remove Vertical Blinds

Removing vertical blinds can be a manageable task. Following these straightforward steps, you can safely remove your blinds without breaking them.
- Choose your approach: Decide whether to remove the slats individually first or take down the entire mechanism simultaneously. Removing the slats first can simplify removing the headrail, but if the blinds are manageable in size and height, you can proceed directly to removing the headrail.
- Remove the brackets: If a safety casing secures the drawstring to the wall, use a flathead screwdriver to open the case and unscrew the bracket from the wall.
- Take down the blinds: If you remove them first, use the wand to open them.
- Remove the slats: To remove individual slats, lift them and twist them slightly out of the clips, similar to removing a shower curtain.
- Take away the headrail:
- Examine the back of the headrail. Two small metal spring clips are on each side. Insert a flathead screwdriver behind each clip and twist to unlock that side of the headrail.
- Carefully lift the headrail off the top of the window frame.
- Take down the hardware: Use a screwdriver or drill to remove any connecting hardware from the window frame.
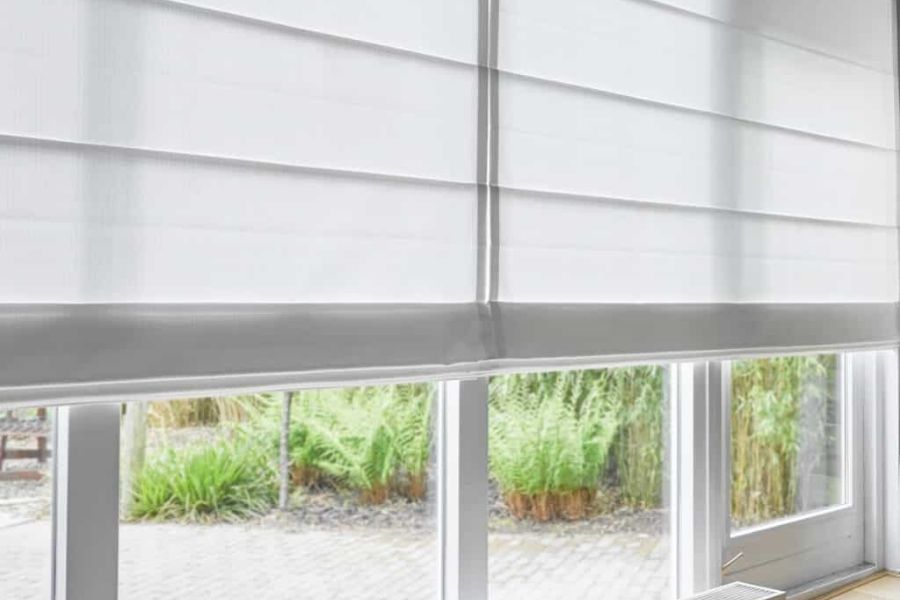
How to Remove Roman Blinds

Roman blinds may resemble Roman shades but attach to the window like other blinds. Snaps, Velcro, or clips typically attach the top of the fabric shade to the front of the headrail, allowing easy detachment to reveal the mechanism behind it.
Once you expose the headrail, follow the same steps for removing Venetian or vertical blinds, depending on your shade’s structure. Usually, spring clips are on the front or back of the headrail. Use a flathead screwdriver to open these clips and pull the headrail away from the brackets.
How to Remove Curtains

Removing curtains, draperies, and other window treatments and their hardware will be easy if you follow these five steps:
1. Spot clean curtains:
- Before you remove the curtains, always dust or spot-clean them.
- Use a lint roller or duster to clean them.
- Shake the curtains out, then vacuum the floor to capture fallen dust or debris.
- If you have a brush attachment for your vacuum, use it on the curtains. If not, use the gentlest suction setting.
- Gently scrub any stains with a warm, damp cloth and let them dry.
2. Take down the curtain rod:
- Use a ladder or sturdy step stool, and remove the curtain rod carefully.
- If your window is a standard size, remove the rod from the center to ensure even weight distribution. This action helps avoid injury or wall damage.
- Ask a family member or friend for help with expansive windows, long rods, or heavy curtains to ensure your safety.
3. Disconnect the curtains from the rod: Remove them first if your curtain rods have finials. Then, slide the curtains off the rod and place them on a clean surface.
4. Remove all screws and hardware:
- While an electric drill can be helpful, a manual screwdriver is best to avoid wall damage. Be aware that some rods have hidden screws, possibly inside the rod’s tracks.
- You’ll need to patch some holes if removing all the curtain hardware. Here’s how:
- Use a flat-head screwdriver to clean the hole, then stuff it tightly with newspaper.
- Mix patching compound or spackle paste as per the package directions until it’s stiff but workable.
- Remember to use a putty knife to apply the compound and fill the hole, ensuring it is flush with the wall. Let it harden for about 30 minutes.
- Apply a drywall joint compound, scrape it flat with a small knife, and let it dry overnight.
- Use sandpaper to blend the repair into the wall and paint over it.
5. Fold and keep your curtains and hardware:
- To prevent parts from being lost, gather all of your hardware in a labeled plastic bag and tape the bag to the curtain rod or its box.
- Carefully fold or roll your curtains to avoid damage and wrinkles. Clean and dry them first (see step 1).
- Folding: Fold curtains in half until they fit in your storage container. Fewer folds mean fewer creases, but this method is unsuitable for delicate fabrics.
- Rolling: Lay out your curtains on a clean, flat area. Fold them in half to match the length of the storage tube, then roll them and slide them into the tube. This option is best for lighter, more delicate fabrics.
Pro-tip:
- Use an airtight container to store curtains to keep them fresh.
- You can also store curtains on hangers, which is convenient if you change them seasonally. Store hung curtains in a dark, dry closet. However, this method is unsuitable for long-term storage as dust can accumulate.
The Banana Technique
The Banana Technique can be considered the fastest way to remove blinds or curtains. However, don’t rush to try this method without knowing the following key points:
Warning: This technique is only for experienced builders or blind installers and carries a high risk of damaging the blinds, injuring yourself, and damaging the wall. It is intended for quickly removing specific blinds in large quantities, not for do-it-yourself use.
Suitable curtains for the Banana Technique:
- Roller blinds with a headrail 28mm or thinner (around 1.1 inches).
- Flimsy roller blinds, vertical blind tracks, or curtain tracks.
- Blinds were installed wall-to-wall (no ceiling brackets).
- Aluminum Venetian blinds (will be destroyed).
- Situations where patching ceiling brackets or wall plugs is acceptable.
- Avoid using this technique on blinds you plan to reuse, as it will cause them to break.

Here’s how to take off window blinds using the Banana Technique:
- Step 1: Grip the blinds: Firmly hold the blinds with both hands in the center.
- Step 2: Execute the downward jerk:
- In a single, forceful, downward jerk, pull the blind headrail downwards.
- Transfer your body weight through your hands onto the blinds (similar to a close-grip chin-up without lifting your feet).
- Step 3: Expect the outcome:
- The sudden movement should fold the blinds inwards.
- This action will reduce the blinds’ width.
- Disengage the mechanisms from the brackets.
- The blinds should detach instantly. Lay it down and remove the brackets with a drill.
Remember: This technique is risky and destructive. Only attempt it if you are a professional and understand the potential consequences.
Voila! Now you know how to remove blinds and the secret to storing them properly for future use. Whether you want to refresh your space or want a change, we’re here to assist with all your window treatment needs.
At Creative Windows, we offer an extensive selection of window coverings that can elevate your home. From custom blinds, shades, shutters, and draperies to a wide range of fabrics, trims, and hardware – we have everything you need in various materials, prices, and styles.
Contact us today to make an appointment and transform your home into a place you adore!
Frequently Asked Questions
-
How do you remove blinds from windows?
First, how to remove the blinds from a window frame, locate the spring clips on the front or back of the headrail. Use a flathead screwdriver to loosen these clips. Once you loosen the clips, gently pull the blinds towards you, away from the headrail.
After removing the blinds, unscrew the brackets from the window frame with a screwdriver. The procedure for operating the blinds may differ by brand or model, so it’s vital to refer to your manufacturer’s manual for specific instructions.
-
How do you take down blinds with hidden brackets?
Here’s how to remove window blinds with hidden brackets:
- Look for the spring-loaded clips on the back or front of the headrail.
- Use a flathead screwdriver to loosen each clip.
- Gently pull the blinds away from the headrail until they release.
- Unscrew the brackets from the window frame with a screwdriver.
-
What is the easiest way to clean window blinds?
The easiest way to clean your blinds is to use a microfiber cloth attached to a retractable wand. Other simple methods include wiping with dryer sheets, removing and cleaning individual vertical slats, using traditional hand dusters, or using a vacuum with an attachment.